Unlocking the Potential of Raspberry Pi Zero for WiFi Hacking
Written on
Chapter 1: Introduction to the Raspberry Pi Zero W
The Raspberry Pi Zero is an incredibly versatile device that offers a wide range of functionalities within the affordable category of Raspberry Pi products. In this guide, we'll explore how to enhance its capabilities and effectively utilize it in various situations. This is not a comprehensive tutorial on WiFi penetration testing, but rather a discussion on the potential applications of the Pi Zero. Always remember to act within the law.
Requirements and Setup
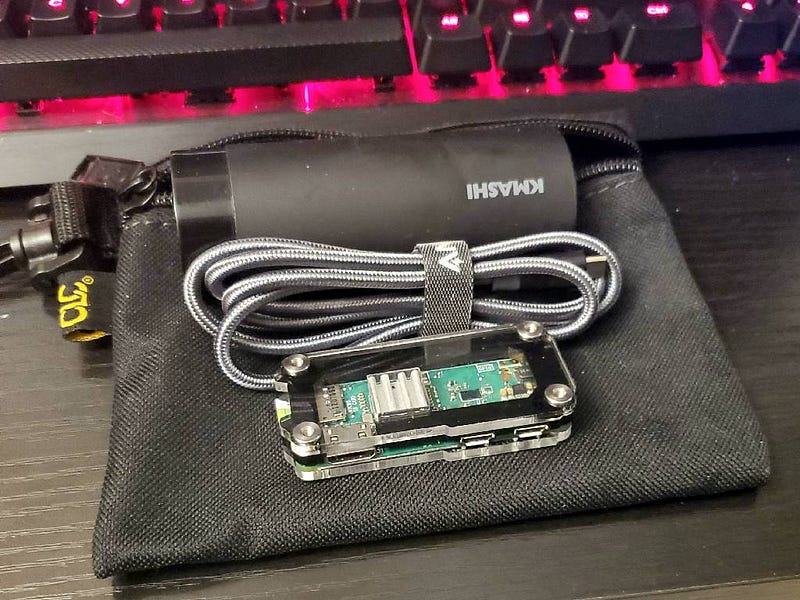
To maximize the benefits of this setup, you will need a Raspberry Pi Zero W (available for around $10 from Adafruit), a suitable case (I purchased mine for $7 on Amazon), a reliable micro USB cable (generally priced around $6), and a USB battery bank (the one I found on Amazon is slightly overkill at $22, so it pays to shop around). Additionally, a Micro SD Card is required; I recommend the Samsung PRO Endurance, which costs about $11 for 32 GB—plenty of space for your projects. In total, this setup could cost up to $56, but many users might already have some of these components on hand. You could also opt for a less expensive case and a cheaper SD card if desired.
The setup process closely resembles my previous article on using the Pi Zero W as a WiFi hacking device. Start by imaging the SD Card with Raspbian Lite. For a headless NDIS/Ethernet Gadget connection, configure the boot partition. Circuit Basics offers a helpful tutorial on this, but the essential steps include adding an SSH file to the boot folder and appending dtoverlay=dwc2 to the end of the config.txt file. Remember to format the file as LF. Next, edit cmdline.txt to include modules-load=dwc2,g_ether after rootwait. Insert the SD Card, connect the USB cable to the Pi and your computer. If you're on Windows, install Bonjour to access the Pi via the address raspberrypi.local (most Macs and Linux distributions support mDNS natively).

Finding Your Pi
Once you can locate your Pi, SSH into it and set a static IP for the USB network. Adafruit has a solid guide, though it lacks some steps. Essentially, you'll need to configure a static IP in /etc/network/interfaces. Use the command ifconfig to check your current USB network configuration.

To configure the static address, enter the following into the terminal:
sudo nano /etc/network/interfaces
At the bottom of the file, add:
allow-hotplug usb0
iface usb0 inet static
address 192.168.7.2
netmask 255.255.255.0
network 192.168.7.0
broadcast 192.168.7.255
gateway 192.168.7.1
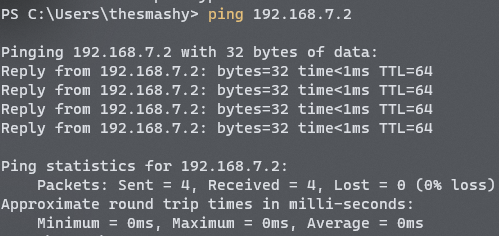
After saving and exiting, update your DNS settings in /etc/resolv.conf to point to a valid nameserver (like your PiHole). Reboot your Pi, and adjust the IPv4 address and gateway for the Ethernet Gadget to 192.168.7.1, then ping 192.168.7.2 to confirm your Gadget now has a static IP.

Building the WiFi Gadget
To continue enhancing your WiFi Gadget, run raspi-config to set localization options, expand the filesystem, and allocate GPU memory. After rebooting, update Raspbian with the following commands:
sudo apt-get update && sudo apt-get upgrade
Next, install the Re4son kernel for Raspberry Pi (kalipi):
tar -xJf re4son-kernel_current.tar.xz
cd re4son-kernel_4*
sudo ./install.sh
Set up a monitoring interface (mon0) by editing rc.local:
sudo nano /etc/rc.local
sudo iw phy phy0 interface add mon0 type monitor
sudo ifconfig mon0 up
After saving and rebooting, verify the presence of mon0 by typing ifconfig.
Installing and Utilizing Tools
The two primary toolsets you can deploy with your WiFi Gadget are Aircrack-ng and Bettercap. While there is some overlap, both are powerful and effective tools for different tasks. Aircrack-ng has a long-standing presence in Kali Linux, making it well-documented and widely used.
To install Aircrack-ng, run:
sudo apt install aircrack-ng
A great introductory article on Aircrack-ng can be found here. Generally, you will want to use the Pi Zero to capture a handshake and then transfer that data to a more powerful machine for cracking.
To stop potential interfering processes, use:
sudo airmon-ng check kill
The usual culprit is the wpa_supplicant process. Use the command below to view all accessible APs and clients:
sudo airodump-ng mon0
To search for handshakes, refine your scan by specifying a channel and BSSID:
sudo airodump-ng -c 1 --bssid 00:11:22:33:44:55 -w WPAcrack mon0 --ignore-negative-one

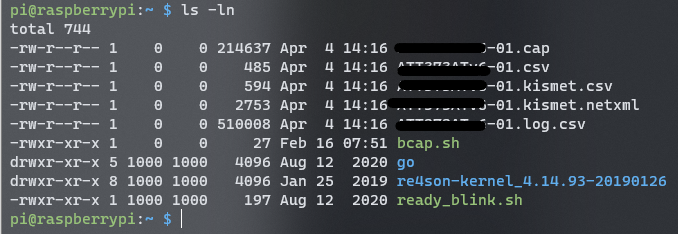
If successful, you will obtain a .cap file along with logs and CSVs containing reconnaissance data.

You can now use Aircrack-ng with the .cap file to crack the handshake. However, avoid using the Pi Zero for this process; instead, SCP the file to a more powerful computer and consider using it alongside John the Ripper for faster results.
Bettercap
Bettercap is a more recent and adaptable tool, operable from the command line or via a web interface. With the static IP setup on the USB port, connecting to a laptop is straightforward. Additionally, I enjoy running it from my smartphone over SSH via Bluetooth.
To install Bettercap's prerequisites, execute:
sudo apt install build-essential libpcap-dev libusb-1.0-0 libnetfilter-queue-dev git
You will also need a properly configured Go environment. A helpful script can be found here. After sourcing Go, compile Bettercap:
go get github.com/bettercap/bettercap
cd $GOPATH/src/github.com/bettercap/bettercap
make build
sudo make install
Once installed, update the latest caplets and web UI:
sudo bettercap -eval “caplets.update; ui.update; q”
To enable the remote UI, run:
sudo bettercap -caplet https-ui

The Bettercap web interface is user-friendly and provides extensive data. If there are network clients, you can explore detailed information.

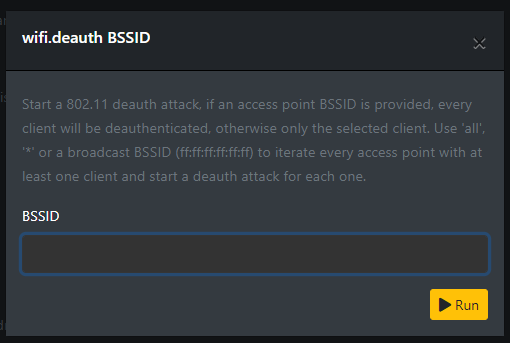
The Command section offers various commands based on your connectivity types. In WiFi commands, you can enable or disable reconnaissance, and even deauthenticate a BSSID with a simple click.

Additionally, you have the capability to create a fake access point with customizable parameters.

Bettercap also includes a Bluetooth reconnaissance feature, which is intriguing and worth noting.

After capturing a handshake, Bettercap stores it in the bettercap-wifi-handshakes.pcap file. This file may contain one or more handshakes from various BSSIDs. You can convert it to the hccapx format, which is compatible with Hashcat. Use hashcat-utils or an online service for this. The key point is to transfer the pcap file to a more powerful machine and utilize Hashcat to crack the handshake. Cloud-based options are available if you lack a capable GPU.
Mobile Use
For mobile use, refer to the original article for Bluetooth setup guidance. Pairing the Pi Zero with a mobile phone allows SSH control. You can also tether the Pi Zero to a Windows or Mac laptop via USB for SSH and browser access, eliminating the need for a compatible WiFi adapter or dual-boot setup. I often connect my Pi Zero to a USB battery bank within my backpack while using my phone via Bluetooth to conduct inconspicuous WiFi reconnaissance during commutes.
Final Thoughts
I hope this exploration enhances your understanding of the Pi Zero W's functionalities. My experiences with Bettercap have been particularly rewarding, thanks to its impressive reconnaissance capabilities and the functionality of caplets. If you've ever wanted to create a pwnagotchi without the hassle of an e-ink display, setting up this device with Bettercap can achieve similar outcomes. May you discover new applications for this tool in your arsenal. Thank you for reading.
This video demonstrates how to create a WiFi hacking device using a Raspberry Pi Zero W.
Watch this video to learn about building a portable hacking machine with a Raspberry Pi Zero.